
How to Make Herbal Beer (Ale), Part One
My husband (Mr. HHH) and I started our home brewing journey a few years ago using the pre-made kits from the local home brew store because we didn't know what we were doing, quite frankly. Then I read Stephen Harrod Buhner's book, Sacred & Herbal Healing Beers, and became entranced with making herbal beers. So, when the "Craft of Herbal Fermentation" course over at the New England Academy of Herbal Medicine opened up, I applied as a blogger for the course and I was SO thankful to be accepted! Today, I just finished Unit One of the course, and guess what?! It's all about using herbs to brew ales and beer. What a delight!

Have you ever wanted clear directions for making your own home brew? And would you like to add herbs for healing or for taste? In Part One of this How to Make Your Own Herbal Home Brew series, you will be guided through all the steps up to the second ferment so you can get started making your own beer using herbs! #diy #beer #ale #homebrew #herbal #howtomake #howto #ferment #healingharvesthomestead
This first unit was clearly laid out, and I LOVE the video of Tara Welty engagingly explaining the tutorial from start to finish for an herbal beer brew. I'm not usually a video fan, but she did such an excellent job of sharing her own opinions without sounding judgy and providing clear explanations for why she did everything! If you don't know anything at all about brewing beer or using herbs, this first unit in the course alone will get you going! She makes it all easy!
This post is a Part One of How to Make Herbal Beer from scratch, using wildcrafted and dried herbs. This article is based on and inspired by Tara's video in the Craft of Herbal Fermentation course. Now, she does do some things differently than I do, and I'm glad to be able to read about, view, and try different methods! I'll be sharing the results with you. Here we go!
This post contains trusted affiliate links. This simply means that if you happen to click through one and make a purchase of some type, I may earn a very small commission at no extra cost to you!
How to Make the Wort
First off, you have to make your "wort." This is essentially the herbal tea sweetened with the sugar you plan to use in your brew. The wort is the foundation of the brew, and most of the outcome of your beer will be based on the taste of the herbal tea and the type of sugar you use. The yeast plays a role in the taste, too, but we're not quite there, yet.

Juniper and Mormon Tea harvested from our mountain area.


The dried herbs I'll be using!
Step 1) Infuse and/or Decoct Your Herbs
Where do I get my herbs? Any herbs I don't grow myself or wild harvest, I purchase organic from Starwest Botanicals.
What is a Decoction?
I chose a combination of roots, rhizomes, tough woody sprigs, as well as a couple of "softer" green type herbs for this brew.
Because roots, berries, and tough stems are "hard," you need to make a decoction. This means that you simmer the herbs gently in water (decoct them) for around 30 minutes in order for the roots/berries/etc. to release their flavors and beneficial herbal constituents. Since they are "hard" herbs, they need more heat and time to get the health powers and taste into the liquid--hence, the need to decoct them.
I decocted these herbs together:
2 ounces of Ginger Root
1 ounce Sarsaparilla
1/2 ounce of Licorice Root
Several sprigs of Mormon Tea from the mountains
A large sprig of Juniper leaf & berries from the mountains

Simmering herbal roots, berries, woody stems in water for 20 - 30 minutes is what decocting the herbs, or "making a decoction" means.
What is an Infusion?
An infusion is a much gentler way of getting softer, greener herbs to release their helpful chemical constituents. Any type of soft leaf, flower, and some stems need to be infused. This means that you measure out the herbs you want to use into a glass jar, then pour just boiled water over, cover, and allow to steep for 20 to 30 minutes. Your herbs don't "cook" this way---they gently release the taste without becoming bitter.
You can find out more about herbal infusions and making medicinal teas here.
I infused these herbs together:
1 ounce of Hops
1 ounce of Nettle Leaf
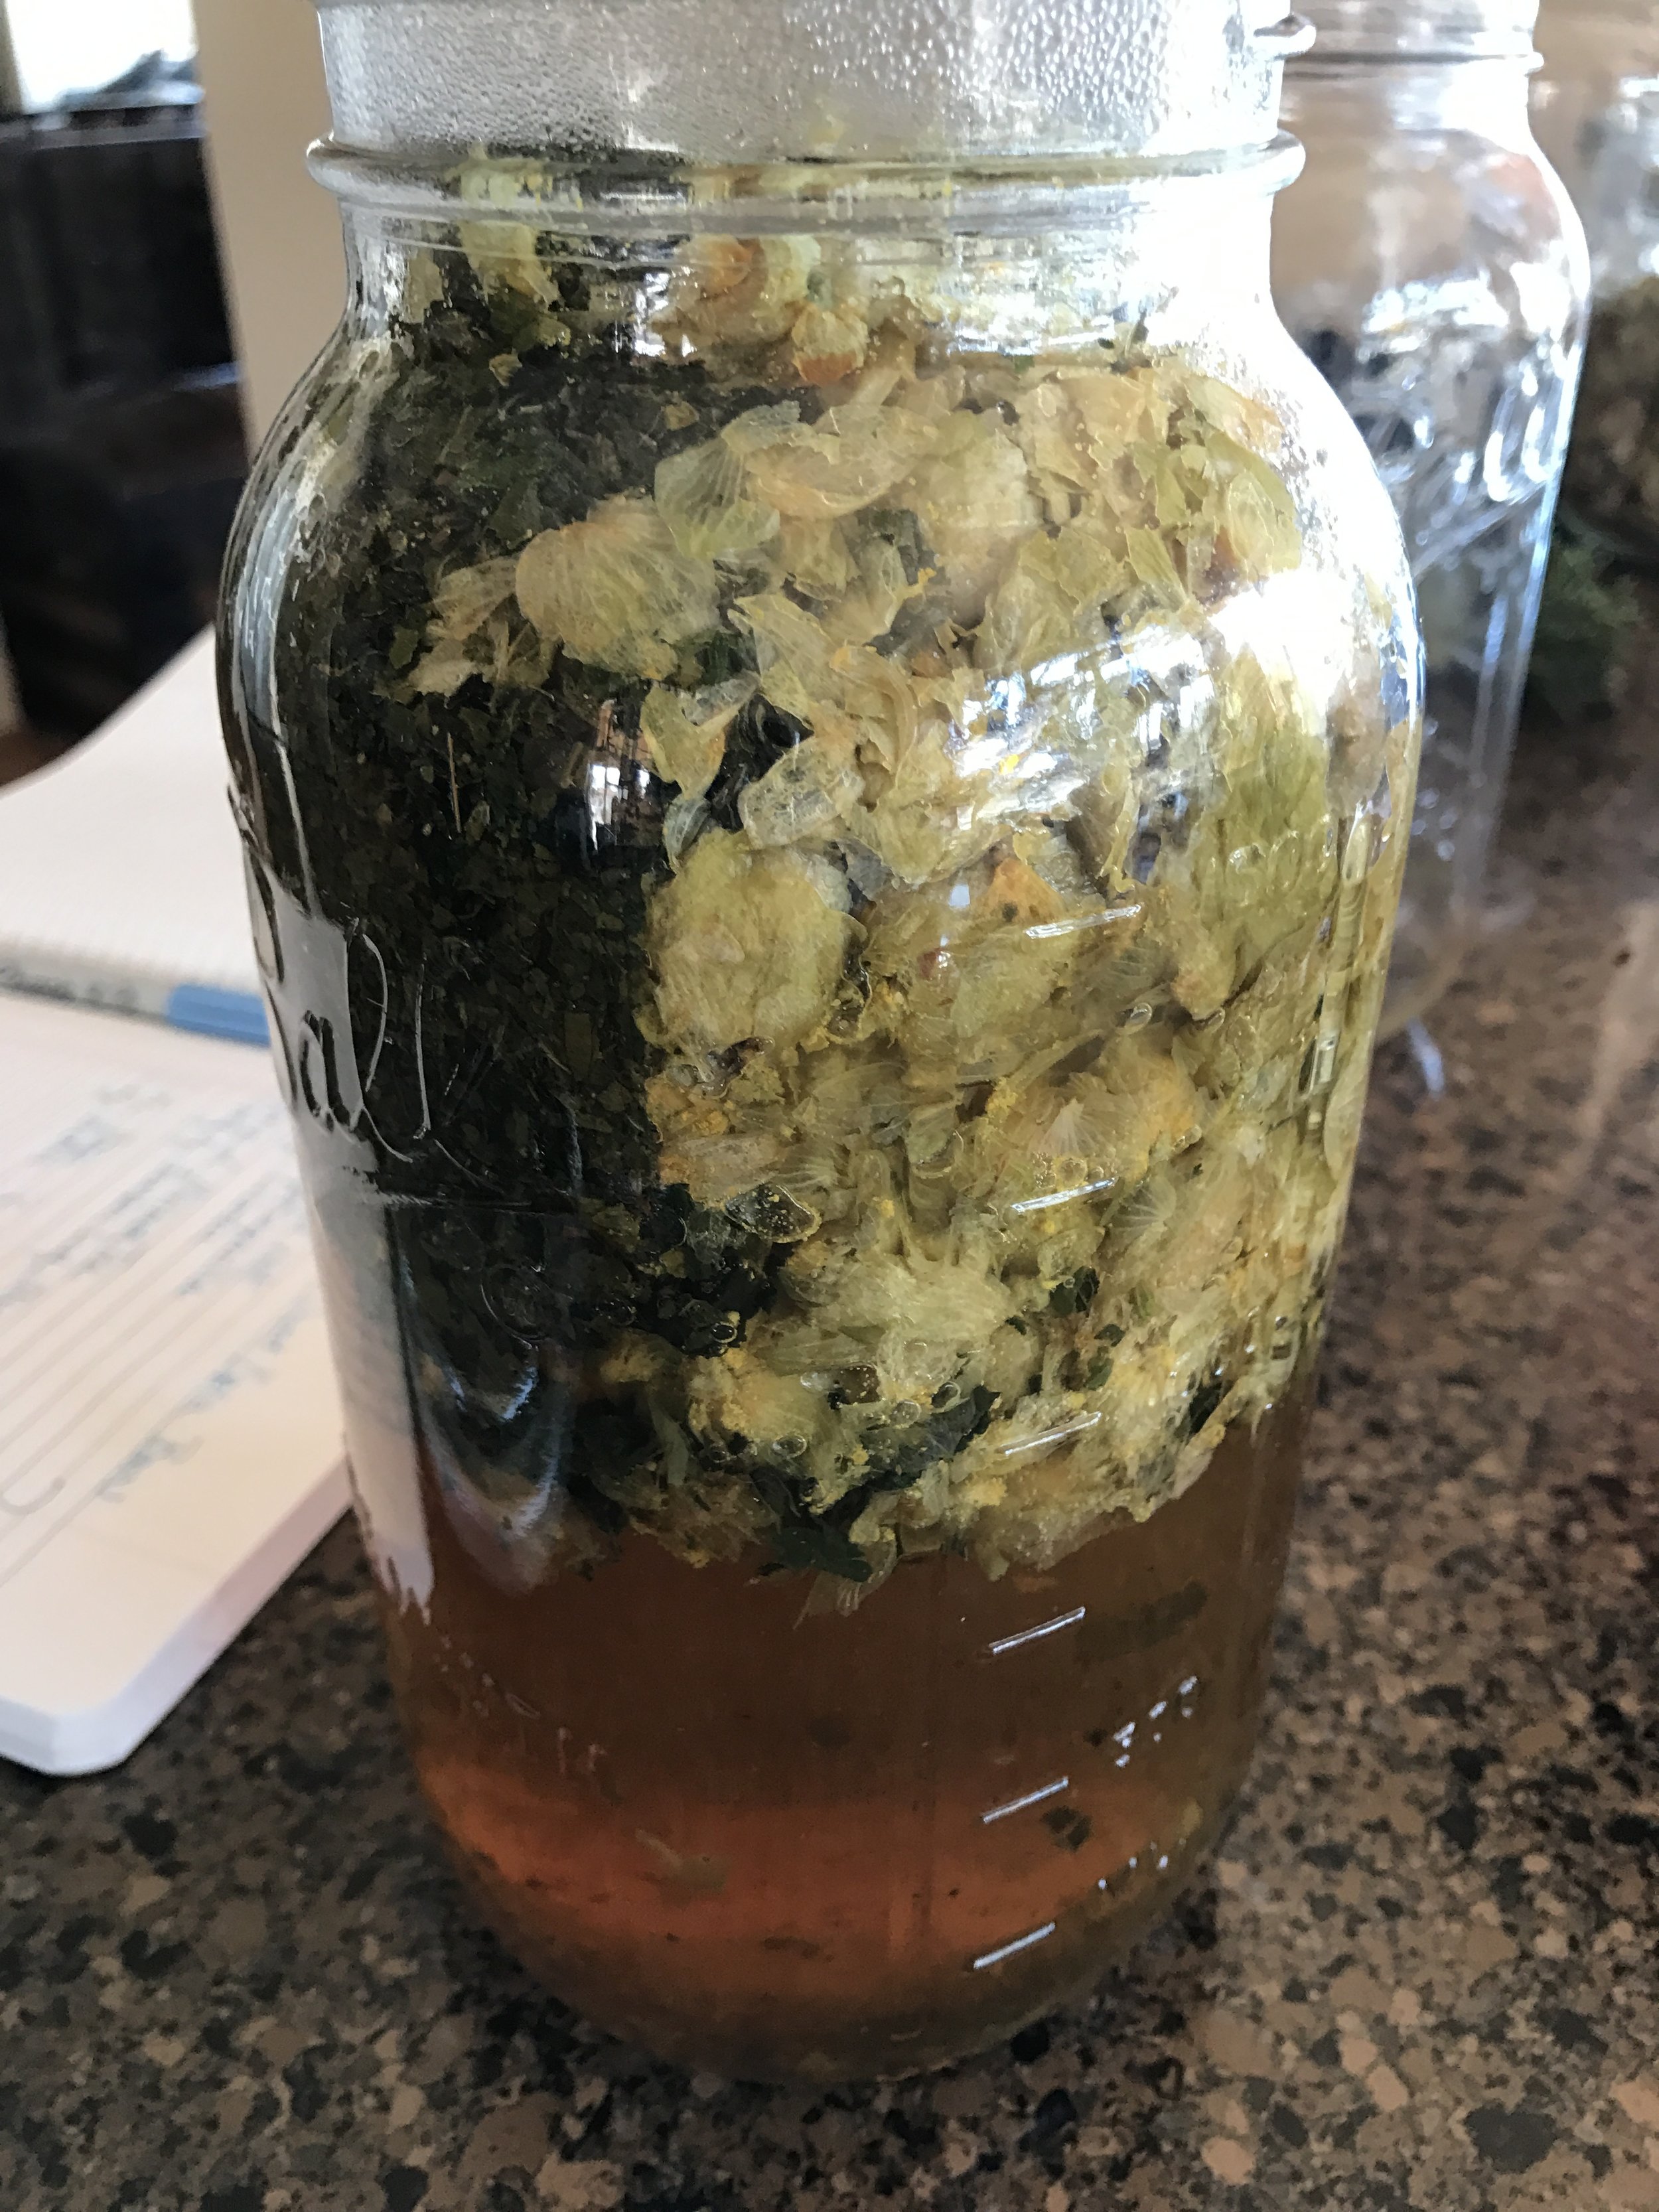
Here are the Nettle leaf and Hops strobiles infusing in just boiled water.
Step 2) Get the Taste Right
Using a strainer, separate the liquid from the herbal matter.
This is where, after straining out the herbal matter (marc) from the liquid, you play around with how much of each to combine, taste testing along the way. I tend to like bitter tastes, plus it rounds the beer out nicely. I also like the spicy taste of the Ginger, and decocting it this way made it pretty perfect. Had I to do it over again, I would probably have reduced the Juniper berry/leaf or left it out altogether.
The herbs used in my recipe do some different things to the brew. The Ginger adds a nice spicy taste and finish (hopefully---we will find out), while the Sarsaparilla and the Licorice Root give it some added sweetness. The Juniper is astringent, while the Mormon Tea contains drying tannins that will offset too much sweetness. The Nettle is incredibly nutritive and powerful, and also acts as a gentle bitter. The Hops supplies most of the bittering effect to round it all off. The Hops is also calming.
One thing Tara Welty did that I didn't do (and I'm kind of wishing I had done) was to keep her decoctions and infusions all separated into single herb teas for more ease in blending after the herb was strained off. Live and learn, right? But I think my wort is still quite tasty!

The sugar and molasses---waiting for the tea!

If you are interested in just dabbling with herbalism and want to begin by formulating your own herbal teas for pleasure & health, this book will get you started!
Step 3) Get Your Wort Ready
Pour the hot tea into your gallon jug using a funnel. Then pour in your sugar For this brew, I used:
1 pound of organic Cane Sugar
2 tablespoons of black strap Molasses
The wort needs to sit until it is completely cooled down. I gave it a good shake now and then to help dissolve the sugars.

The decocted tea is going in---and in a minute the infused tea (behind to the left) will be strained and it will be added!

Here's the wort....waiting for the yeast. I think it's about cooled now. It's been cooling for about 6 hours!
Step 4) Add Your Yeast
Once the wort is completely cooled down, it's time to add your yeast! You can use yeast from a home brew shop, and this is what most people say to do. You can also use bread baking yeast. This is what I happened to have on hand, so guess what I used? Yep! Bread baking yeast. I've used it before, with decent results, so I have high hopes! The yeast can definitely affect the taste of the brew, and some people think the bread yeast gives it a flavor that is a little too strong. Frankly, I'm ok with that!
3-4 grams of yeast (I use a kitchen scale that can convert to metric). Most of those yeast packets in the home brew shops are meant for 1 to 2 packet to be used in a 5 gallon batch. Since I only made a 1 gallon batch, I tried to find out the weight of the packets. The above measurement was about as close as I could get.
I suppose just using a packet of Ale yeast, as Tara Welty explained to do, would be the easiest way--but since I just had surgery and can't drive yet---it's bread yeast that is just going to have to do. PLUS, Stephen Buhner says in his book, Sacred & Herbal Healing Beers, that is just fine!
(When you sprinkle the yeast onto your ferment, it's called "Pitching the Yeast.")
Step 5) Set Up Your Airlock or Alternative
Most home brewers use an airlock. This is a simple contraption that allows the gases from the fermentation process to release from the bottle. You can also just place several layers of cheesecloth over the top of the gallon jug if you don't have an airlock (Buhner).
I sent Mr. HHH to the home brew store to see if he could find an airlock set up for the size opening on the gallon jug I am using---in the meantime---I'm using the cheesecloth. It works just fine so far, and it's what I use for many of my other ferments.
You should store your fermenting ale/beer in a cool, dark place, around 70 degrees if possible. I'm just going to keep mine on the counter! It's fun to watch!
Step 6) Wait and Be Patient
This is the hardest part! But you do get the entertainment of watching the bubbling and frothing of the fermentation process take place before your very eyes!
Next, in About Two Weeks: Decanting, Priming, and Bottling!

Here it is, sitting in the window sill, along with some beet kvass, tomatoes, & eggs. My cat, Harriet, is wondering what on earth I am doing now! :-)
This has been a fun Part One article to write! (Well, they all are, actually!) I hope you enjoyed this and look forward to Part Two in about two weeks!
In case you haven't gotten a chance, please sign up for our weekly newsletter so you won't ever miss a thing! :-)
Hugs & Self-Reliance,
Heidi
P.S. Sign up for the newsletter! You’ll never miss a thing plus you’ll get access to the Resource Library (free)!
Just Complete the Form Below:

Look at that froth! About two hours after pitching the yeast, it's bubbling and foaming away!