
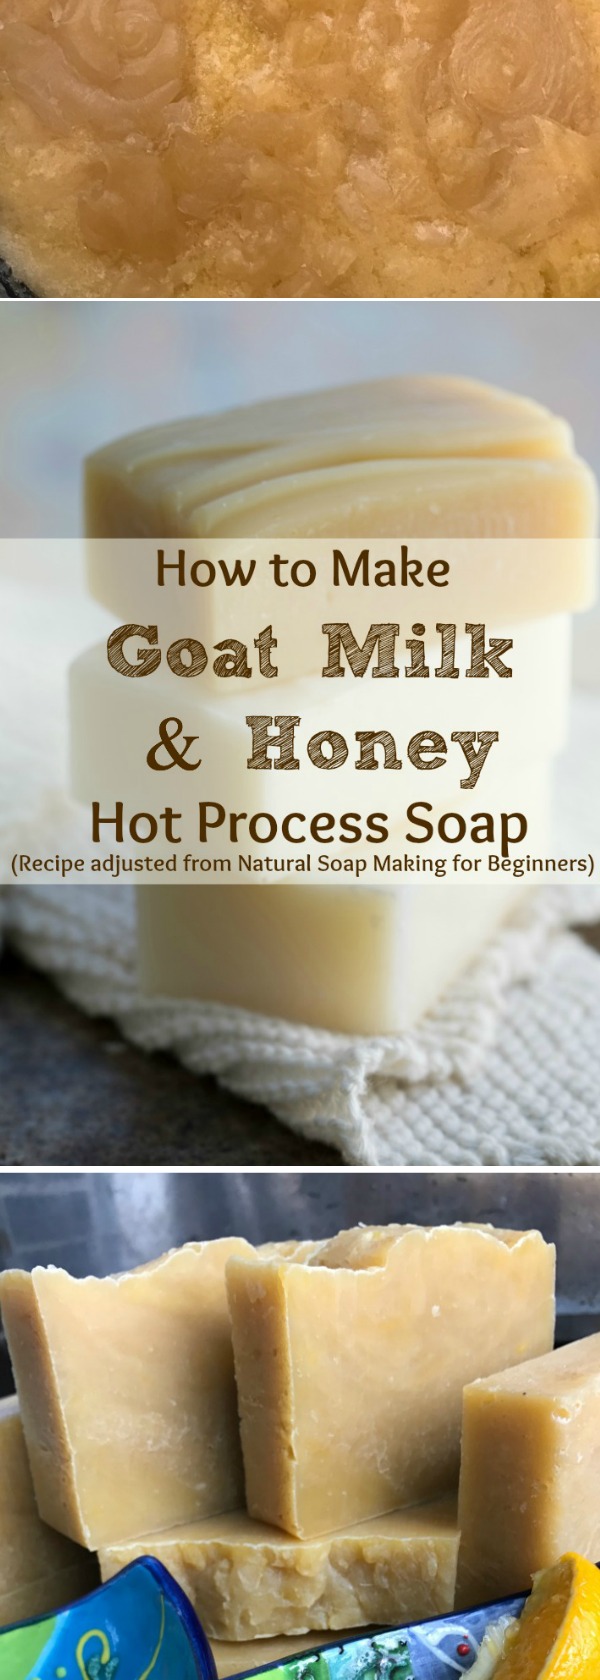
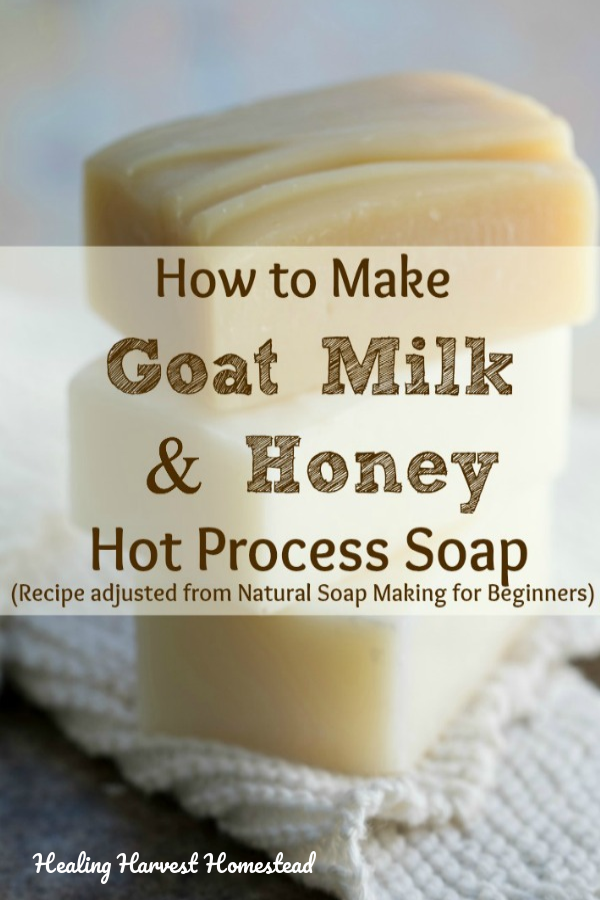
How to Make Goat Milk & Honey Hot Process Soap (A Quick & Easy Tutorial & Recipe)
I love making my own handmade soaps for our family. And….I’ve been wanting to give goat’s milk soap a try using the hot process method. What has stopped me up until now is that I’d heard you can’t use milks when you make hot process soap. But when I was asked to test out a goat milk & honey recipe for a friend, I figured I’d give this style of soap making a try!
I have a couple of friends who have even begged me in the past to try making goat milk soap because of how moisturizing it is....but nope. I just wouldn't go there. But when this friend asked….I finally figured it was time to experiment with milk and the hot process soap method.
My friend, Kelly Cable, owner of Simple Life Mom, and the author of The Natural Soap Making Book for Beginners, shared her amazing Goat Milk and Honey recipe with me, along with a copy of her new book to review.
She encouraged me to give the hot process method using this recipe a try, and to please let her know what I changed and how it went.
"Oh, no!" I thought. "Now I'll have to give Goat Milk & Honey soap a try!" I'm afraid of failure, so I was hesitant. Isn't goat milk soap difficult to make? Can't it burn and turn an ugly looking brown color with a weird smell? Aren't there some extra steps to take?
But then, I looked at it this way: If even I could make this recipe work, then ANY body can, right? What a testimony this would be to the effectiveness and ease of the natural soap recipes in Kelly's new book!
Guess what?!....I DID it!
Follow the steps below to see how I adjusted this milk recipe to the Hot Process Soap method and created lovely golden Goat Milk & Honey Soaps from this phenomenal soap recipe!
I have to say, I am SUPER impressed with this recipe, and if a beginning soap maker like me can take a goat's milk & honey recipe and use the hot process method on it, then it is a FABULOUS recipe.
I'm really excited to try out more of Kelly's recipes in her new book, Natural Soap Making for Beginners, available on Amazon. She is thorough in her explanations, and I know every beginner new to soap making will find success in her book! (NOTE: The full book excerpt for this recipe follows my altered directions, so you can see what it looks like.)
FTC Disclosure: There are affiliate links scattered throughout this article. If you happen to click through and make any kind of purchase, I may earn a small commission at no extra cost to you!
I've always wanted to make Goats Milk & Honey Handmade Soap! Here is a recipe for natural Moisturizing Hot Process Goat Milk & Honey Soap, PLUS how I changed the directions from Cold Process Soap to the Hot Process soap making Method. Make your own soap! This recipe is from this incredible book: Natural Soap Making for Beginners, by Kelly Cable.
A quick note about the differences in appearance between cold process and hot process soap:
You can find a complete list of benefits and downfalls of both hot process and cold process soap in this article: Cold Process vs. Hot Process Soap: Which is Better? But in the meantime here is a quick rundown:
Cold process soap is usually smoother and a little “prettier” than hot process soap. When you make cold process soap, you have to pay close attention to the temperatures of the oils and lye solution, or the soap may not come out right.
With hot process soap, you're soap will not be as "pretty" as cold process (although beauty is in the eye of the beholder, right?), and will have a rougher top with a more "rustic" appearance.
However, your soap will "cook" through all the phases quickly while you get to watch it! You also get to use your hot process soap right away, while the cold process soap will require four to six weeks' curing time. I'm impatient...I admit. I like to enjoy my soaps right away!
You can find out more in the above article I just mentioned.
Before You Start:
If you are new to making hot process soap, you might be interested in taking a look at these posts, which are complete picture tutorials of each step.
Even though I've been fairly complete here, it always makes sense to be sure you are comfortable with all steps! Make Your Own Soap, Lavender-Rosemary Hot Process Soap, and there are many others on my website too!
AND, if you’d like a free copy of my Hot Process Soap Making Checklist (which is a total life-saver for helping you stay on track with all the steps), you can get it by filling out the form at the end of the article or clicking through the link above.
How to Make Goat Milk & Honey Soap Using the Hot Process Method
Goat Milk & Honey Soap Recipe by Kelly Cable:
Yield: 3 pounds or twelve 4-ounce bars
Lye Discount: 15%
Label: Moisturizing
Start to Finish Time: 2 hours, 24 hours in mold, 4 to 6 weeks to cure (Now, that is for COLD process---for HOT process, it was 2 hours, then 4 hours in the mold IN THE FRIDGE, and NO curing time needed.)
Kelly says, "Though a Castile bar was the first soap recipe I made, I dreamed of making a Goat Milk and Honey Soap bar. Well, here it is. Using milk and honey in a recipe means you need to be aware of a few more things, but it's pretty easy once you get the hang of it. Enjoy the many nourishing benefits of this soap!"
Tools You'll Need:
Kelly includes an equipment list with her recipes, but I made some changes for the hot process method, so although some of these tools are the same, some are different. Here is the list I used:
Large stainless steel pot
Large wooden spoon
Measuring Cups, stainless steel
Ingredients:
OILS
10 ounces Olive Oil (I purchase from Costco)
8 ounces Lard (I have never used lard before! I got mine on Amazon.)
8 ounces Coconut Oil (Costco has great prices!)
4 ounces Sweet Almond Oil
2 ounces Beeswax
LYE SOLUTION
4 ounces Goat Milk, Frozen to semi-solid
8 ounces filtered water
4 ounces lye (sodium hydroxide, and I always use food grade)
ADDITIVES:
1 ounce Orange Essential Oil
1 Tbsp raw honey

Ready to make your own all natural homemade soap right in your crock pot? It’s easy! I’ll walk you through the whole process, step-by-step, along with many recipes and demonstrations for natural textures, herbal additives, colorants, and natural scent blends!
Steps I Took to Adjust Kelly's Goat Milk & Honey Recipe for the Hot Process Soap Method:
Step 1) Always be SAFE
Whenever you are working with lye, ALWAYS wear gloves, long sleeves, and safety glasses. Lye is dangerous! No children or pets should be around while you are working with lye. I always mix my lye solution up outside because of the fumes, even on cold, snowy days.
Step 2) Prep Ahead
I placed the goat milk into the freezer for about 2 hours. It became semi-solid. Kelly says to not let it freeze, and I think mine might have been a little more frozen. The thing about using milk to make soaps is that it can burn when you add the lye to the liquid. If this happens, chances are, you won't end up with a lovely bar of soap, and it may even smell bad. So, the colder the goat milk is, the better off things will go when you combine it with the lye. I placed the water in the fridge, so I'd have very cold water.
In all honesty, I did not read the directions carefully---I should have combined the milk and water, then put the combination into the freezer. This would have been a better option. :-)

This is the goat milk, water, and lye solution all mixed up. Look at that beautiful color, and the goat milk was cold enough that it didn't burn! So far, so good!
Step 3) Combine Your Oils
Since I used a crock pot because of the "cook" in hot process soap making, I only heated the solid oils in the pot on the stove over very low heat. With cold process soap making, you have to watch the temperature of the oils and the lye solution carefully. With hot process soap making, temperature is still a factor, but much less so, since you will be heating everything up and "cooking" your soap.
Once the solid oils (in this case the lard, beeswax, and coconut oil) were melted, I poured them into the crock pot. Then I added the remainder of the oils.
**At this point, I still had the crock pot OFF because I wanted my oils to remain liquid, but not be too hot when I added the lye solution, due to the goat milk.
Step 4) Mix the Lye-Water-Goat Milk:
Put on your safety gear: gloves, eye-wear, and long sleeves, PLUS a mask if you are very sensitive to fumes. Working outside, VERY slowly only pour 1/4 of the lye into the milk-water combination and stir well. Let cool for 20 minutes. (I didn't actually wait this long because my milk-water combo was more frozen than it should have been.) Repeat this until all the lye is dissolved into the milk-water. Kelly states, "If your milk still browns, don't worry. Your soap will just be darker."
My lye solution ended up being a beautiful lemon color!
Again, with hot process, I don't worry about the temperatures of the lye solution or the oil mixture too much.
Step 5) Combine and Bring to Trace
Pour the lye water into the crock pot of oils. Use a stick blender to mix well until a light trace is formed. Basically, your mixture should look a bit like pudding, with little peaks forming.

This is how the soap mixture looks like at trace in the crock pot. Interestingly, as this soap began its "cook," it first turned into a hard block of opaque soap (still VERY caustic) with the trace marks still there!
New to homemade soap making? Or are you interested in learning how to apply more advanced textures (like salts) to your hot process soap making? This course is for you! Click here for the deets!
Step 6) Cook!
Turn your crock pot to LOW, and allow your baby soap to cook. What happens during this phase is that the soap moves through the chemical stages much faster than in cold process. Since heat is being applied, there is more chance that the goat milk will still burn or become much darker.
**So here is what happened with my soap, that I was NOT expecting and had not ever experienced before: The soap became very hard, then BAM! All of a sudden, the oils and liquids separated! Oh No!
I knew I had measured everything correctly, so I decided to re-emulsify the mixture with the hand blender. Here is a picture of what that looked like--you can see swirls of the opaque re-emulsified mixture in the blend.
Once I re-emulsifed the mixture, I watched it carefully through the cook phases. What emerged was a lovely soft looking batch of soap. Once it went through the gel stage (and you'll know this because the soap will become translucent and a little "waxy"), I tested to be sure it was done.
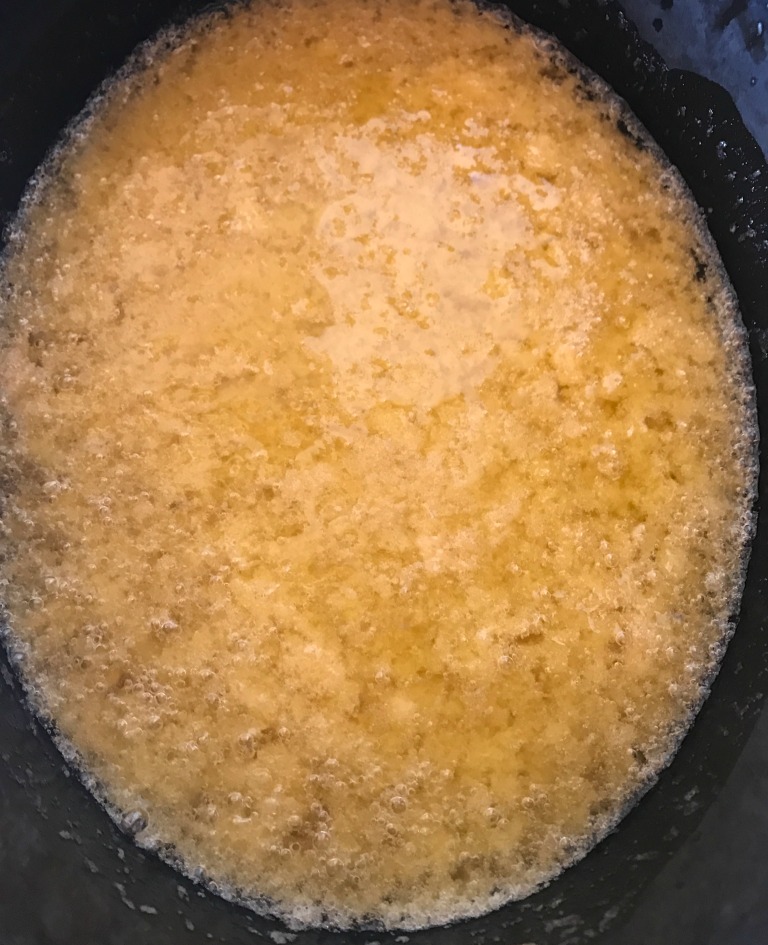
OH, NO!!!!! This is NOT a good sign when making hot process soap. Basically, the oils and liquids are separating, and unless something is done fast (re-emulsification), the chemical reaction that changes the molecular structure of the oils won't happen. What's left? A big caustic mess.

Stick Blender to the Rescue! I just re-emulsified the separated mixture once again. Those opaque swirls are the soap being brought back to a hard trace again. I mixed a bit more....then let it go back to cooking.
Step 7) Test to See if the Soap is Done
When the soap is done, it will have some easy to note characteristics. It will be translucent, kind of like petroleum jelly. Also, if you take a little pea-sized amount between your fingers, it will be waxy and malleable, and will not fall apart. Finally---you do the ZAP test.
I do the "ZAP" test. I know some people don't like this, but for me, it's been the best way to test hot process for doneness. You just take a dab of the waxy soap, rub it a bit between your fingers until it's not so hot, then place it on the tip of your tongue. If it ZAPS you (and you will KNOW if it does), then it's not yet finished OR something went wrong in the process. If it doesn't ZAP you--you're soap is good to go!
Step 8) Add the Additives
This is where, in hot process, you add any extra scents and moisturizers (like honey). Pour in your essential oils and the honey and STIR, STIR, STIR until everything is mixed in well.
Step 9) Spoon the Soap into the Mold
This soap is much more liquid-feeling than the soap I'm used to making. I decided to put it into the fridge to cool down. I also figured this would benefit the goat milk. It ended up being in the refrigerator for about four hours, as it wasn't cooling as quickly as my normal soap recipe does.

Interested in learning how to use herbs in your daily life for your wellness and family’s health? Begin now by taking the 5-Day Home Remedy Making (Herbal Foundations) mini course. It’s FREE!
Step 10) Allow to Cool Completely and Remove from the Mold
Just allow the soap to cool completely, into a nice solid block. Once it's completely cooled down, you can gently pull the sides of the mold from the soap, turn it over, and press gently to continue removing the soap from the mold.
Step 11) Allow to "Rest"
I let this block of soap sit for about 24 hours before cutting into it because it still felt really soft. After 24 hours, I was able to cut it into some nice bars. Now, a couple days later, it's PERFECT!
The soap turned out GREAT! It's a lovely, extremely moisturizing soap, and the color ended up being absolutely beautiful---A nice Golden color. I was very happy with the results!

Here is how the bars turned out! For the smooth topped bars, I just cut the rough part off. People seem to like this better sometimes. The rough-topped soap is actually how hot process soap turns out. Personally, I like it.
Final Thoughts on Using Goats Milk in Hot Process Soap
I’m glad I had the opportunity to share this first time experience using a milk in my hot process soap making. I learned a lot, and I hope you did too! Since this first experience, I’ve made LOTS of different milk soaps using the hot process method, and they are just wonderful!
I hope you’ll give it a try too!
Here are some other articles you might like about soap making and some recipes:
How to Make Hot Process Soap: A Picture Tutorial
Octoberfest Beer Soap: Men Love This!
Sexy Wild Man Soap Recipe: One of My Biggest Sellers Ever!
Hot Process vs. Cold Process Soap Making: An Honest Look
And there are more on the website!
Hugs, Health, & Self-Reliance,
Heidi
P.S. If you haven't already, I hope you'll sign up for our newsletter! You’ll get the Hot Process Soap Making Checklist right away, PLUS you’ll also get access to the free Resource Library, which I update weekly with eBooks, guides, checklists, and lots more!
Just complete the form below:
Actual Excerpt from Natural Soap Making for Beginners
Goat Milk and Honey Soap by Kelly Cable
Yield: 3 pounds or twelve 4-ounce bars
Lye Discount: 15%
Label: Moisturizing,
Start to Finish Time: 2 hours, 24 hours in mold, 4 to 6 weeks to cure
Scent: Orange
Though a Castile bar was the first soap recipe I made, I dreamed of making a Goat Milk and Honey Soap bar. Well, here it is. Using milk and honey in a recipe means you need to be aware of a few more things, but it’s pretty easy once you get the hang of it. Enjoy the many nourishing benefits of this soap!
Equipment list:
Large stainless steel pot
large spoon
scale
bowls for measuring ingredients
thermometer
stick blender
small zip top bag
glass or plastic bowl for lye water
mold
parchment paper
rubber spatula
measuring spoons
Ingredients:
10 ounces olive oil
8 ounces lard
8 ounces coconut oil
4 ounces sweet almond oil
2 ounces beeswax
4 ounces lye
8 ounces filtered water
4 ounces goat milk
1 ounce orange essential oil
1 Tablespoon raw honey
Safety First!
Remember to wear your safety equipment and mix the lye water outside.
Tell everyone you live with that where you're working is off limits.
Give yourself enough time to complete the recipe.
Prep Ahead: Combine the water and milk in a large glass, plastic, or stainless steel container. Place milk-water into the freezer for 1 to 2 hours. It is okay if a slush forms, as long as it doesn’t freeze. The colder your milk-water, the lighter your soap will be after adding the lye.
Instructions:
1. Heat the Fats/Oils: In a large pot over medium-low heat, combine olive oil, lard, coconut oil, sweet almond oil, and beeswax. Heat until they are melted and incorporated. Remove from heat and allow to cool to 90-100°F.
2. Mix the Lye-Water: Put on protective gear including a mask, gloves, and long sleeves. Outside, very slowly pour only ¼ of the lye into the milk-water and stir until dissolved. Let cool for 20 minutes. Repeat until all lye is dissolved into the milk-water. If milk still browns, don’t worry. Your soap will just be darker. Allow to cool to 90-100°F. If oil or lye water cool at different rates, you can use a cold or hot water bath in the sink.
3. Prepare the Mold: While the oils and lye water cool, line the mold with parchment paper.
4. Combine and Bring to Trace: When both oils and lye water are around 90-100°F, pour the lye water into the pot of oils. Use a stick blender or hand mixer to mix for 1 to 2minutes and then let the mixture rest for 4 to 5 minutes. Repeat mixing and resting until light trace.
5. Mix in Natural Additives: When soap reaches light trace, add essential oils and honey and blend for 30 seconds.
6. Mold the Soap: Pour the soap mixture into the mold, cover with a lid or parchment paper for 24 hours. Do not insulate unless your house is below 75°F, then insulate by placing a towel around the outside edges to avoid a partial gel.
7. Cut and Cure: Remove soap from the mold. If it seems too soft to remove, wait another 12 to 24 hours before removing. Cut the soap into twelve 4-ounce bars. Allow the bars to cure for 4 to 6 weeks.
Tips: Milk can scald when lye is added. Placing the milk-water in the freezer until it’s very cold helps prevent this. Be sure to add lye slowly. It is okay to really take your time, coming back every 20 minutes to add a little more. Adding milk can also make your batch get hotter than usual, so just insulate a milk recipe lightly with a towel if you’re concerned about getting a good gel for color. Honey can also make soap come to trace faster, so add it and blend really well right before pouring soap into the mold.
I love this recipe for goat milk and honey soap! I decided to adapt this cold process recipe for the hot process method, and you can see how it turns out here! You’ll also get the recipe, plus step by step directions for both cold process and hot process soap! This is a luxuriously moisturizing soap you’ll just love! #goatmilksoap #goatmilk #honey #goatmilkandhoney #howtomake #soap #handmade #healingharvesthomestead