
Fermented Tomatoes: A Traditional Russian Recipe Filled with Healthy Probiotics (It's Easy Too)
This article contains one of my favorite recipes for fermenting tomatoes. If you have too many tomatoes this harvest season, as summer merges into fall, try fermentation for some amazing probiotic, healthy deliciousness!
My garden, and my dad's garden especially, EXPLODED with ripe tomatoes just this past week or two. He brought me a HUGE box of them! On top of these, we still had our own popping out of our own garden in droves.
But I have been so busy this harvest year that I haven't had time to can things like I normally would. So....I have turned to fermenting my produce as one of my favorite ways to preserve vegetables. Here's why: Fermented food is GREAT for you! It contains tons of healthy probiotics that heal and support your body.
Also, it's just a very natural process. Fermentation is caused by natural good bacteria and yeast found in our environments that also happen to be the “good” bacteria we need for a healthy microbiome and good gut health.
Another reason fermentation is a favorite over canning is the heat. Using any kind of extreme heat (as in canning) kills all the bacteria: both the good as well as the bad. There is a time and place for canning, but why not consider fermentation for the immeasurable health benefits?
When you eat fermented foods of different kinds, you give your body such a health boost! It seriously keeps your gut healthy! And if your gut is healthy, it's likely the rest of you is too, as our guts are now becoming known as our second brain (control and command center).
AND, the food will last for literally months under the right conditions. What else could you ask for? So, I think you will LOVE this easy fermented whole tomato recipe that was inspired by the traditional USSR-Ukrainain style from this website.
FTC Disclosure: There are affiliate links scattered throughout this article. If you click through and make any kind of purchase, I may earn a small commission at no extra cost to you.

Are you lucking out with a ton of tomatoes this harvest season? Well, it’s not too late to give this quick, easy, healthy recipe for traditional fermented tomatoes using this Russian recipe from the Old Country. No canning required to preserve your tomatoes! You’ll have delicious, gut-healthy probiotic preserved food in no time! #fermented #fermentation #howto #preserve #tomatoes #recipe #tomatorecipe #preservingtomatoes #healingharvesthomestead
What Do You Need to Ferment Tomatoes?
1. Tomatoes---Organic
2. Spices---I used a good spoonful of garlic, some peppercorns, along with peppers from the garden
3. Any other veggies you want to add. I used celery, zucchini, and cucumbers from the garden because I just had to do something with them too.
4. Brine: About 2-3 tablespoons of Sea Salt to a quart of water. I used about 4 1/2 to 5 tablespoons Sea Salt for my half-gallon Mason jars. NOTE: You can use about half the salt if you use whey or another starter culture such as water kefir, kombucha, or already fermented brine.
5. Mason Jars---I like the big half-gallon size for tomatoes, just because tomatoes are so large. But you can use quart size wide mouth jars just fine. Quart size jars are also great for cherry tomatoes!
6. A little time and burping (it’s probably not what you think)! I’ll explain more in a sec….

If the tomatoes are small enough, pierce the tops and bottoms a few times. This will allow the brine to soak in and ferment the insides too.

If your tomatoes are too big for the jar top, like this one was, then just cut in half and skip the piercing.

I'm adding celery, cucumbers, peppers, and even some zucchini (not pictured here) to this ferment. I've GOT to use up the last of my veggies, and this is a great way!
How to Make Fermented Tomatoes
1. Wash your tomatoes.
2. Pierce the tops and bottoms a couple times with a fork (see pic above)
3. Mix up your brine. See the bottle I'm pouring from? I've found that when I'm making a lot of fermented veggies, it's often just easier to make up a huge batch of brine, then shake and pour it in.
I use a quart size Mason jar to do my measuring and shaking to dissolve the salt, then use a funnel to pour into the large bottle. THEN it's super easy to pour into your veggie jars. To make the brine, use 1 1/2 to 2 tbsp. sea salt (or other mineral rich natural salt) per quart of water.
4. If you have starter culture from a previous batch of fermented veggies, kombucha, or water kefir, or whey, you can pour about a 1/2 cup per half-gallon Mason jar.
Using a starter culture speeds up fermentation and also allows you to cut back a bit on the salt. But if you don't have it handy (I didn't this time), then that's just fine. The veggies will ferment in the brine just fine! (A rhyme!! :-)
5. Fill your jars with the veggies & spices.
6. Pour your brine (and starter if you are using) over all, to within about an inch from the top.
7. The tomatoes are heavy, so if you have packed your jar, you probably won't need a weight to keep the veggies under the brine. If you do, a boiled rock or a fermenting weight works great!
**Please be sure you do have all the veggies under water, though. I thought I had all mine under, but I had a tomato top sneak up over the top of the liquid. Find out what happens if you mess up here!
8. Let sit for several days. After a day or two, you will notice the liquid turns cloudy. This is a good sign. After the second day, you will need to "burp" your jar lids to allow built up gases to escape. You'll see bubbles rising like crazy up through the liquid and bursting at the top!
You won't need to "burp" your jars if you are using an airlock system or a lid with a nipple, like some of the ones you see in my pictures. I like the plastic lids because there is no metal to possibly corrode due to the salt/acid.
Using an airlock like this for your wide mouth Mason jars means you won’t have to “burp” your jars because gases are released naturally without you having to open the jar. Either way works great!
9. When you feel they are ready (it's ok to test one out---just use a clean utensil and no double dipping to prevent mold), to taste your fermented creation.
If you like the taste, then place into cool storage ('fridge or a root cellar or cold room that is about 50 degrees or less. The cold room slows down the fermentation process, but it will keep fermenting slowly. Therefore if you are storing for a while, be sure to "burp" once in awhile.
NOTE: If you are using an airlock system, then replace with a true lid for storing.
**I let my ferments go much longer than others seem to. In fact, these fermented tomatoes fermented away on my counter for nearly three weeks, and they were just fabulous! Six months later, I still had a jar in our cold-room, and they were still quite wonderful.
That's IT! Enjoy! These are SO good! You can also use the leftover brine for cooking too. The tomato juices give it such a delicious flavor. I promise you won't be able to stop eating these!
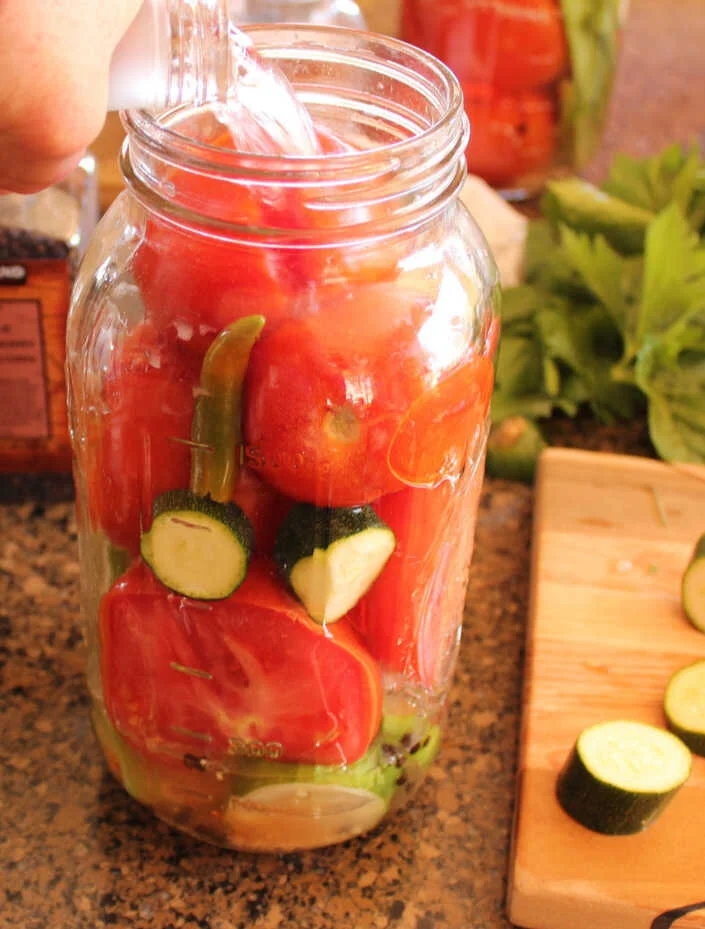
Here is a jar all ready for the brine. A good spoonful of garlic, some peppercorns, zucchini in this one, peppers, some celery, and now...I'm pouring in the brine to completely cover. You want to make sure there are no air bubbles, so you may have to tap the jar good a few times, or even use a utensil to move things around a bit to get all air out.

Isn't this a beautiful sight? And so easy!

Here are 5 half-gallon Mason jars ready to sit and ferment for a few days. I'm using plastic lids here. That's because they don't corrode from the brine, and they are easy to "burp." Since there is no airlock on these, I will have to burp them by just loosening the lid once or twice a day to let the gases from the fermenting process escape. I love doing this. You get to see all the bubbles rise to the top and hear the pfffft! of the gases coming out! It’s a great science experiment for kids, too.
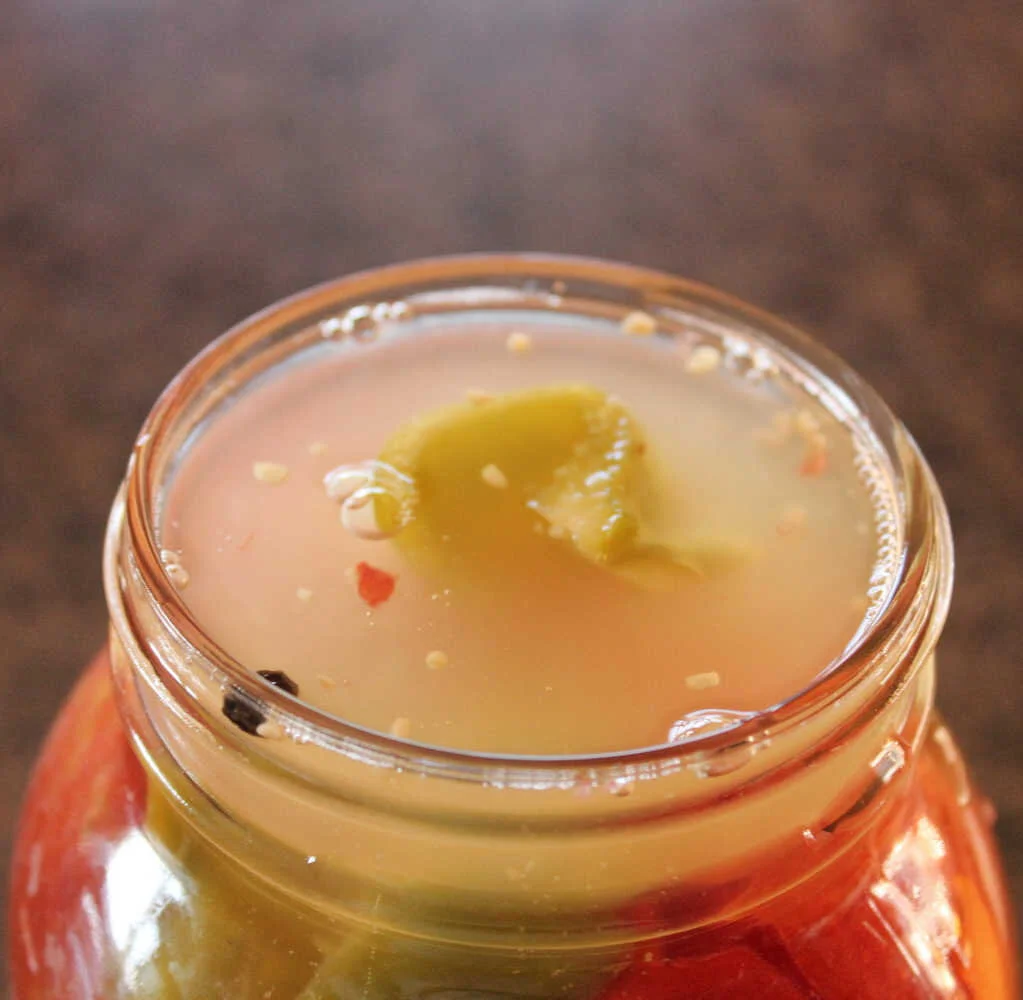
This is how the ferment looks after 3-4 days. Notice the water has turned cloudy--that is a good sign. See the bubbles? You can't see it because this is a still shot, but the bubbles are rising like crazy! See that pepper that sneaked on top of the weight? I'll have to take that out so it doesn't mold!

YUM! Here are some of these fermented tomatoes----fresh from the ferment. I have to say, it was REALLY hard to stop eating them!
Where Do You Buy Great Herbs and Spices for Your Ferments?
I buy almost all of my herbs (medicinal and culinary) and spices from Starwest Botanicals. The shipping is fast, the quality is excellent, and they are clear about the origin and quality of their herbs.
I buy organic from them! Besides the fact that the quality is better, you can buy organic or wild harvested, the prices are SO much less than grocery store prices. You can buy a ton of high quality bulk spices, then freeze them. I also make many of our own blends and save even more of the dollars!
Here are some books and resources that helped me started with fermentation, in case you’re just beginning your fermented foods path for your health: The Complete Idiot’s Guide to Fermenting by Wardeh Harmon, The Art of Fermentation by Sandor Katz, Nourishing Traditions (a complete favorite forever) by Sally Fallon, and Fermented Vegetables.
Final Thoughts on Fermented Russian Tomatoes
As I’ve said….I do just love fermented foods and using this process as one of my food preservation techniques. This particular recipe is simply easy, healthy, and outstanding in its taste. You can serve these as a side dish, on salads, or even cook with them. They are particularly wonderful with eggs and rice!
If you have a lot of tomatoes to do something with this harvest season, I hope you’ll give this recipe a try! I do believe you’ll become a fan too!
And, to recap the benefits of fermented foods:
higher nutritional value than other preservation methods
super easy
one of the oldest, most traditional methods
exceptionally good for your gut health
did I mention? It’s EASY and fast!!! :-)
If you have questions or comments, please do leave them in the comments section below. You might also enjoy these related articles:
Fermentation Myths: Things You Must Know if You Have Questions About Fermentation
Traditional Beet Kvass: A Natural Drink to Replenish Electrolytes….And It Tastes Amazing!
And there are a TON of other fermented foods recipes over on the website, so head over and explore! :-)
Hugs, Health, & Self-Reliance!
Heidi
P.S. Please sign up for the newsletter and never miss a thing! You’ll get immediate access to the Resource Library when you do, too!
Just complete the form below:
Disclaimer: The information in this article, elsewhere on my blog, in my shop sites, in conversations, and on labels is for informational purposes only and not meant to cure, treat, diagnose, or prevent any medical condition. I am not a medical doctor, so please see a medical professional for concerns. I simply provide my own personal advice based on experience and study for ways to live a healthy and natural way of life. I disclaim any liability arising directly or indirectly from the use of any of the information contained in this article or elsewhere on this website. These statements have not been evaluated by the FDA.