
Old Fashioned Pine Tar Soap Recipe
Find out how to make pine tar soap! Soap made with pine tar has many natural benefits for problem skin and is a traditional remedy that’s been used for centuries. It’s definitely a traditional, old-fashioned recipe with a long history of use. Pine tar soap can be helpful for skin conditions including psoriasis, itchy skin, eczema, various skin inflammations, dandruff, and even seasonal threats such as bug bites that itch and poison ivy. Especially when the recipe is combined with moisturizing ingredients, it’s a fabulous soap to use and have in your home.
Benefits of Pine Tar Soap for Natural Skin Care
Making homemade soap is the best way to be sure you’re getting all the helpful ingredients for your personal skin care needs. I love using this pine tar soap fairly often because even with my mature skin, it’s helpful and soothing for occasional itchy, dry skin. Here are some other benefits of using pine tar soap:
1) Soothes itchy skin caused by bug bites; poison ivy, oak, and sumac; and other allergic reactions
2) It’s helpful for calming psoriasis
3) Also calms eczema and dermatitis
4) Beneficial to other types of skin inflammation
5) It makes a great dog shampoo, too. It can soothe itchy dog skin caused by dermatitis from fleas as well as hot spots. If you use some geranium essential oil to lightly scent your soap, this essential oil can also be helpful in warding off fleas and ticks.

Click here to get your FREE Guide on How to Relax Using Herbs and Oils….It’s 24 pages of helpful recipes and information on holistically managing stress.
What is Pine Tar?
Pine tar is a waste product from pine wood high heat carbonization and dry distillation. Basically, the wood is broken down completely into two components: charcoal and pine tar.
This thick, syrupy substance smells a bit like pine, but has strong overtones of turpentine. Don’t worry about the smell in your soap making, though! It comes out smelling just fine. Pine tar has been used for over 2,000 years to treat various skin conditions. It’s soothing and has antiseptic properties. It’s these special actions that make it such a wonderful ingredient in handmade soap for skin conditions.
Here’s a scientific article written about pine tar, in case you’re interested in learning more.
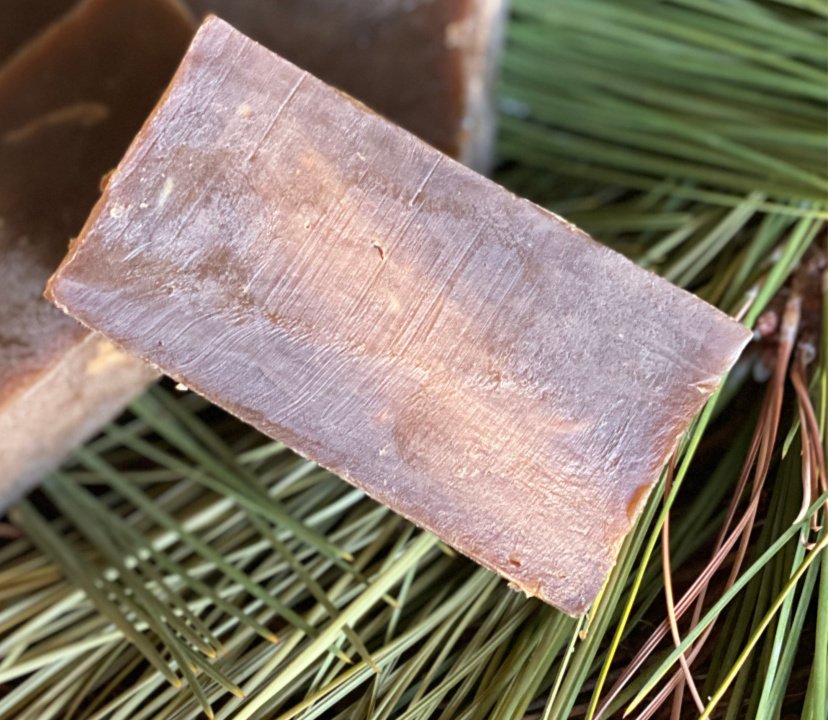
Here’s the finished pine tar soap made using the hot process method.
How to Make Pine Tar Soap
Pine tar soap is fun and interesting to make. If you’re used to making hot process soap, this recipe cooks SUPER fast—-like in 10 to 15 minutes, versus the usual 30 minutes to hour long cook time of other recipes. I prefer the hot process method over the cold process method, especially when using new ingredients. I can monitor the behavior of the soap much better with the hot process method.
One note about this soap recipe, and this is due to how quickly it cooked using the hot process method: If you choose to use the cold process method to make this recipe, I strongly suggest making sure your lye water and the melted oils are around 80 degrees or close to room temperature. Use your judgement about using a stick blender. You don’t want your soap to seize up, so if it’s firming up too quickly, just switch over to a wooden spoon.
With the hot process method, I used my stick blender just fine, but it gelled up really quickly. I also didn’t worry about the heat factor….hot process is by itself…hot. :-)
If you want to watch a soap making picture tutorial, you can read this article. You can also watch the YouTube video included in this article right here, where I show you step-by-step how to make this pine tar soap recipe. Finally, if you’re ready to learn ALL things natural soap making, consider taking my thorough Natural Soap Making Course!
If you’re not familiar with homemade soap making or specifically the hot process method, please be sure to refer to one of the links above for all the safety needs and tools. I’m not covering safety or basic soap making tools and needs in this article. Be sure you know how to make handmade soap with the hot process method before trying this recipe.
**NOTE: All measurements are by weight. You need an accurate scale for soap safety and best results.
Ingredients for Pine Tar Soap
The Oil Phase:
8 ounces of coconut oil
3 ounces of pine tar
14 ounces of organic olive oil
2 ounces of castor oil
3 ounces of shea butter
The Water Phase:
11.4 ounces distilled water
3.92 ounces sodium hydroxide (lye)
Optional Additives at the End:
Essential oils for scent, around 1 to 2 ounces. Good choices that would smell fine with the overtones of the pine resin include lemon, pine, frankincense, patchouli, cedarwood, rosemary, juniper berry and others. Add your essential oils at the end of the cooking process, and be sure to stir them in well before putting the soap into your mold.
You could also consider adding a tablespoon of neem oil at this stage if you like. Neem oil helps with many of these same skin conditions, and I believe there’s a wonderful synergy between plant ingredients we can create in our products.
If you’d like some texture, adding some rosemary powder or juniper berry powder would be a nice additive too. And…it’s also helpful with some of these skin issues as well. It also smells very nice.
Here’s why I added each of the different oils to my pine tar soap recipe:
The coconut oil is a cleansing oil, but creates a nice hard bar. It can be a bit harsh on the skin. So can the pine tar, if too much is used. To offset the drying qualities of the coconut oil, I added plenty of soothing olive oil and moisturizing shea butter. The addition of the castor oil provides a very nice lather, while not being overly drying.
Pro Tip: Pine tar soap is different than making other soap recipes because of how fast it sets up. Be sure you’re prepared with all of your items before combining the lye solution and the oils.
**You can watch me make this soap on YouTube too! Please subscribe to my channel if you enjoy the video(s).
Basic Directions:
Step One: Add your oils to the crock pot, set to low. Allow them to melt together completely.
Step Two: Pour your lye beads into the water (never the other way around!). Be sure you’re wearing safety glasses and long sleeved shirt/pants. The lye water solution will be hot. Take care and be sure to use a heat resistant container, preferably Pyrex (my favorite)
Step Three: Pour the lye water into the crock pot. Again, if you’re using the cold process method, be sure to cool both the oils and the lye solution to around room temperature first.
Step Four: Use your stick blender or a wooden spoon and bring the mixture to trace (a thick pudding-like consistency)
Step Five: Allow the soap to “cook” until it reaches a translucent gel stage. You can see what this looks like in one of the direction links above. You don’t want to remove it until it passes through this phase, as this stage shows total saponification of the oils. You can add your essential oils once it saponifies if you like.
Step Six: Put the soap into your soap mold, and press it in firmly. Allow to cool completely overnight or for several hours before removing it.
Step Seven: Cut your soap into bars. Let it cure if desired, for two days to a week or so. You can use it right away, but curing allows any additional moisture to more completely evaporate out of the soap.
Enjoy!

Get your FREE Herbal Remedy Guide to 10 common herbs and how to use them, plus a handy cheat sheet! Click here and I’ll send it to your inbox!

Here’s a screen shot of how this recipe turns out using SoapCalc.net. This is my favorite soap calculator, and I recommend running any recipe you plan to use through it before making your soap.
Final Thoughts on Making Homemade Pine Tar Soap
You might be wondering why there’s no palm oil in my recipe, which makes a nice hard bar. I choose not to use palm for sustainability reasons, so you won’t find palm oil in any of my recipes. I remedy the problem of always obtaining a hard bar by using coconut oil then off-setting with conditioning and moisturizing oils. The screen shot of the recipe as run through a lye calculator shows you the qualities of the soap. I love using this calculator because it gives me an idea of how my soap will turn out in various ways. If I don’t like a certain number/quality, I make adjustments to the recipe before I make it.
As far as this pine tar soap recipe goes….it’s a WINNER.
Not only is it highly effective, it smells good, and honestly, I like the natural caramel brown color of it. It’s just a great soap to have in your soap making toolkit!
If you liked this article, you may also enjoy more of my soap articles:
Wild Violet and Yarrow Homemade Soap with Foraged Flowers
How to Make Hot Process Bastille-Honey Soap for Babies
Sexy Wild Man Soap Recipe (great for both men and women)
Dead Sea Mud Salt Spa Soap Recipe
Lavender-Rosemary Handmade Soap with a Picture Tutorial
Troubleshooting Handmade Soap Problems and Avoiding Common Mistakes
and there are literally hundreds more on my website!
Let me know about your soap making adventures by joining my FREE online Natural Living Community. It’s completely OFF social media on our own private platform, giving you a safe place to ask your questions without prying eyes.
And be sure to join my newsletter and never miss a thing! Get my FREE Herbal Remedy Guide and Cheat Sheet when you do!
Hugs, Health, and Self-Reliance,
Heidi
P.S. Don’t forget to get your free copy of the Herbal Remedy Guide and Cheat Sheet! It’s perfect for your home apothecary or kitchen!
Get your free 24 page guide to using herbs and oils to help you get a better night’s sleep and to handle modern day stress better. Click here, and I’ll send it right away to your inbox!