
How to Make Hot Process Tangerine-Cocoa & Oatmeal Calendula Soap (Natural, Handmade, Lovely)
When I wrote my popular eBook, Hot Process Soap Making, I decided to share the perfect handmade soap recipe! Indeed, it’s still tried and true. It always turns out, and never, ever once has failed me. It’s easily convertible from hot to cold process. In fact, I know of at least eight people who have started successful small soap making businesses with this recipe as the foundation!
But a few months ago, I realized I was in a soap making recipe rut. So I decided to change things up a bit, experiment with some different oils, liquids, and mixtures, learn more about fatty acids and their chemical reactions in soaps, and just plain create some new recipes for fun.
To this point, I’ve tried various beer soap recipes, different herbs like chamomile soap and rose petal soap, and different fats, such as lard, like in this incredible Cedar & Pine soap, and even homemade elk tallow soap. I have even managed to make goat milk and other milk soaps using the hot process method successfully. (Milk is notoriously difficult in hot process.)
These variations and different recipes are just plain fun to try out. Being kind of geek and into experimentation, this is what I tend to do for fun.
Anyhow, yesterday, I chose a recipe from Jan Berry's Simple and Natural Soap Making book (which is WONDERFUL, I may add), and I adjusted it to fit the oils I had on hand, as I was missing a couple of the oils in the recipe, and of course, I turned the recipe into hot process....my favorite method.
The thing about trying new recipes, I have discovered over the years, is that sometimes they don't work. Sometimes things happen. Sometimes trying to turn a cold process recipe into a hot process recipe is harder than you think. And contrary to what many soap makers believe, not ALL soap recipes convert easily from one method to another.
You can find out more about hot process soap making vs. the cold process soap method in this article.
When you are unfamiliar with the behavior of certain ingredient combinations or heat levels or water discounts and more, then you are taking a chance of a failure every time you try a new recipe or decide to be brave and make changes to it.
This is why you always want to run your soap recipe through a soap calculator, like the one at SoapCalc, especially if you are changing it.
Potentially, soap making mistakes can happen. Here are some things that can happen badly with both hot process soap AND cold process soap making:
Your oils may not emulsify fully with the lye solution (been there, done that, and figured it out).
Your soap turns out too soft and doesn't ever harden up.
You end up with DOS (Dreaded Orange Spots) on your soap because the oils you use go rancid in the soap.
The saponification process just doesn't work.
You burn a fragile ingredient (like honey or milk) in the crock pot, and your soap turns out a really ugly color.
I could go on and on! In this article, you can find out a lot more about soap making mistakes you don’t want to make!
I will tell you one thing about Jan Berry’s soap recipes: They pretty much always work. I did change things up a bit, like I said. Between subbing certain oils and creating my own essential oil scent blend, it’s nearly a different recipe, but the basics are there.
This is the fun about playing around with soap recipes. Once you know a bit about oils and fatty acids, scent blending with essential oils, and different natural colorants, you can take any soap recipe and make it your very own!
This combination of cocoa-butter and the tangerine essential oil blend is so lovely! You’ll also enjoy this recipe for Cocoa-Orange Calendula Lotion Bars too. The pair of these: soap and lotion bars make a perfect gift!
So, here is how this new recipe for Tangerine-Cocoa & Oatmeal Calendula Soap went:
FTC Disclosure: There are affiliate links scattered throughout this article for your convenience. If you happen to click through and make any kind of purchase, I may earn a small commission at no extra cost to you.

Making your own handmade soap is a fun way to be sure you’re not getting the toxins found in commercial soaps…and you can be as creative as you like! Here is a handmade soap recipe for the hot process soap making method with a delicious cocoa and tangerine scent. It contains calendula infused oil and oatmeal, which is softening and healing for your skin! #handmadesoap #hotprocess #soap #recipe #cocoasoap #citrussoap #tangerine #oatmealsoap #softeningsoap #healingharvesthomestead #diy #natural
How to Make Tangerine-Cocoa Calendula & Oatmeal Hot Process Soap
LOL....I think it needs a catchier, shorter name! If you have ideas, please let me know in the comments!
Ingredients for Tangerine Calendula Oatmeal Hot Process Soap
Lye Solution:
10 ounces distilled water
3.9 ounces sodium hydroxide (lye)
Oil Mixture:
7.5 ounces Coconut Oil
3.5 out ces Cocoa Butter
12.5 ounces Calendula-infused Olive Oil (You can read this article about how to make an herbal infused oil, if you need to know how to make this oil. You may also just use regular Olive Oil.)
3.5 ounces Sunflower Oil
1 ounce Castor Oil (I usually use a little more Castor Oil, but I ran out. See what happens? You just go with it and figure it out. Jan says you can substitute a bit of olive oil for the Castor Oil, which is what I did.)
Scent:
1 ounce Tangerine Essential Oil
1 ounce Orange Essential Oil
(This combination is SO beautiful and happy being cocoa rich and citrus uplifting!)
Color & Texture:
1 tablespoon finely powdered Oatmeal. I just powdered it up in my herb grinder. This provides a slight exfoliating benefit, and helps moisturize your skin, too.
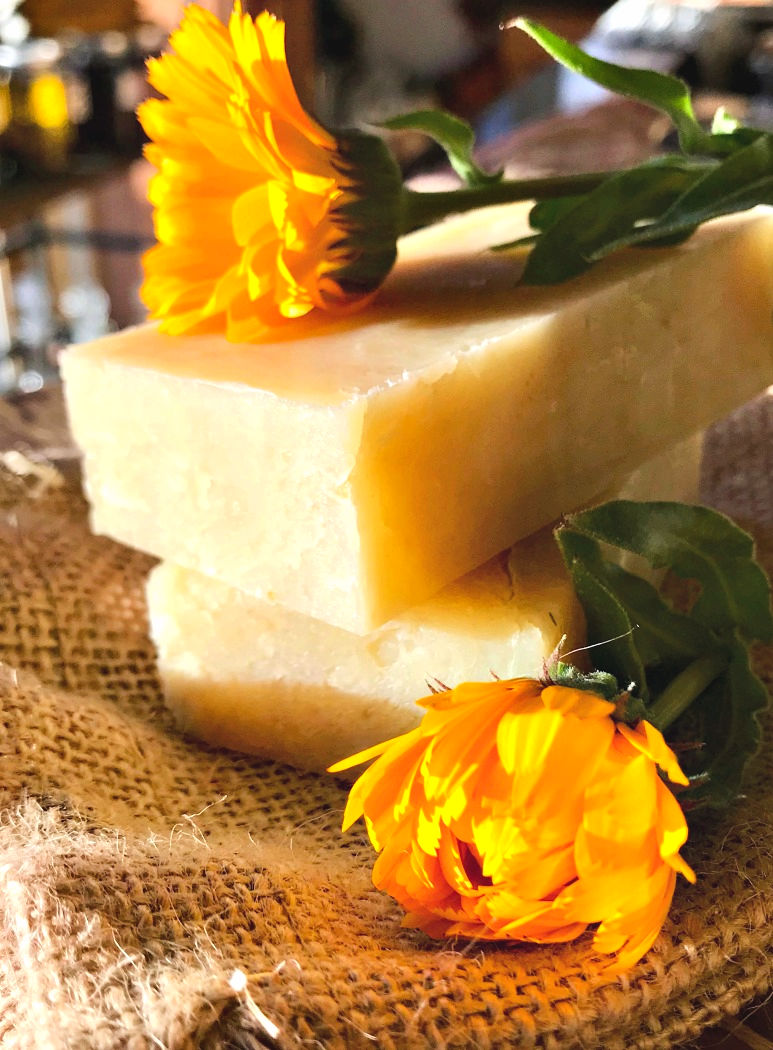
The lovely color of this soap is a pretty light yellow. It comes from the Calendula petals infused in the Olive Oil.
NOTE: Not all herbs add color. You can find some great ways to color your soap in this article, "How to Use Clays and Herbs to Color Soap Naturally." There is also a handy natural colorant chart (among others) in my Hot Process Soap eBook.
Tools You'll Need to Make Hot Process Soap
** A large crock pot
** Wooden spoons (or stainless steel--you don't want to use any other metal)
** Heat resistant measuring pitcher
** Kitchen Scale (VERY important)
** Hand Blender (Also VERY important)
** Soap Mold
** Safety Gloves (and be sure to wear long sleeves too)

Click here to find out more! Get started making handmade soap today!
Directions for Making Tangerine-Oatmeal-Calendula Hot Process Soap
NOTE: These are very basic directions because I've written quite a bit about the hot process soap making method. If you are new to soap making, please read these much more detailed articles, "Lavender-Rosemary Hot Process Soap" and "Make Your Own Hot Process Soap: My Favorite Recipe."
You can also purchase my "How to Make & Customize Your Own Hot Process Soap," which is VERY detailed and includes recipes, charts, and ideas for you to customize your own hot process soap.
And ONE LAST THING: While we are on the topic of safety in soap making, you’ll love my Hot Process Soap Making Checklist and Basic Instructions FREE in the Resource Library. You can get it by filling out the form at the end of this article. It’s REALLY useful.
Step One: Get Your Oils Measured and in the Crock Pot
Set your crock pot to LOW. Measure out your oils (I measure to one-hundredth of an ounce) and put them in the crock pot. Let them melt completely, but not get too hot.
Step Two: Get Your Lye Solution Going
Mix the water and lye. This is IMPORTANT: Always pour the lye into the water---NEVER the other way around. You could potentially have a lye volcano happen, and that might be damaging.
I just set this solution aside in a safe place away from children or pets, either outside or near an open window (due to fumes), while the oils melt all the way.
Step Three: Mix to Trace
Now, pour your lye solution into the crock pot with the melted oils. I don't worry about temperature too much because with hot process you are cooking everything anyway. However, with that said, I've noticed that if my lye solution is really hot, still, sometimes my oils and solution don't emulsify as well. So---A little cool down period for the lye solution is a good thing.
Using your hand blender (make sure your safety gear is on!) blend the oils and lye solution to trace. This will look like pudding, with soft little peaks.
Step Four: Cook the Soap, and the Phases You’ll See
Put the lid on the crock pot and cook the soap! It will go through several stages.
#1) The soap will become very opaque and rather hard.

1) The soap become opaque and rather hard in the middle.
#2) Starting on the edges, your soap will start turning to a gel-like substance, and it may even crawl up the side of the crock pot. This is normal. When there is enough soap gelled, then just stir it on down.

2) The soap starts to gel from the outer edges of the crock pot. It's time to stir it on down!
#3) Any opaque bits still left will begin to gel too, leaving you with something similar to mashed potatoes. Keep stirring.

3) Your soap is almost there. In this picture, you can still see some opacity in the soap. There's gelling going on, but it's not all the way translucent and waxy yet.
#4) Finally, you'll get a nice substance that is similar to petroleum jelly, with a translucent appearance. When you pick up a little ball of it, it will feel waxy and be moldable. At this point, you can do the ZAP test, if you like. Or not. It's up to you. This is the stage where you are almost done!
You'll know when you reach this stage because the soap stops changing. I usually let it go for another 15 minutes, then I check it.
Step Five: Add Any Extras
Turn off the crock pot, and let it sit for five to 10 minutes or so. Now it's time to add your oatmeal and essential oils. Stir super well!
Step Six: Pour the Soap into the Mold
That's it...just glop the soap into the mold. I press it down really well to be sure there are no air pockets in your soap because that would just look kind of ugly.

Step Seven: Allow it to Cool and Then Remove the Soap Block
You'll need to let the soap cool down completely before removing it from the mold. This can take anywhere from five hours to overnight. If you are using a silicone mold (which I prefer), removing the soap is really quite easy.
Now you have a nice block, or loaf, of soap!
Step Eight: Enjoy!
You know what one of the nice things about Hot Process Soap Making is? You don't have to cut the block into bars all at once! Isn't that cool? Leaving the loaf intact longer saves the scent of the essential oils. I just cut what I need at a time.
If you want, you can allow your soap to cure for a few days, as this will allow the soap to harden even more as any residual moisture evaporates. But....I generally cut myself a little bar and use it right away. Because....I have no self-control. Ahem.
How Long Does Making Hot Process Soap Take?
This is a question I get asked a lot, so I'm throwing it in here. The time it takes to make hot process soap depends on the temperature of your home and how solid your oils are when you put them in the crock pot. It also depends a bit on humidity. The recipe also has something to do with how long it takes. Melting the oils can add a significant length of time (up to 30 minutes or so) to the total time as well.
For the actual cooking time, though, you can depend on it taking any where from 45 minutes to about an hour and a half. Honestly, if you let it go a little longer, it's not going to hurt your soap.
From start to finish, you are looking at a total time period from 1 1/2 hours to up to 3 hours or so.
I really love this recipe! It's going to be hard to go on and try new ones again....
Final Thoughts About This Hot Process Recipe
This was a GREAT experiment, and I'm glad I did it. Overall, I would say this recipe is awesome and a success! I really liked using Cocoa Butter in it because Cocoa Butter is seriously one of my most favorite butters in the world. It smells SO good! The scent doesn't really last that well in the soap, but it helps create a nice hard bar.
A little note about the lather. Lather is so important for a good handmade soap to have. Castor oil is one of the ingredients that helps give soap a good lather, and for this recipe, I didn't have enough. But here is a picture! I am happy to tell you this soap lathers beautifully!

Look at this lovely bar! And all the bubbles! I used this soap the very next day after it was made! No curing time is necessary with hot process soap, although it is helpful to harden up the bar.
Do you make soap? What is YOUR favorite kind and why? Do you have a favorite recipe? I'd love for you to share with us! Leave a comment in the comments section!
There are a TON of soap recipes and other miscellaneous soap and body care information on the blog, so I hope you’ll head over to the home page and explore!
Also, stay tuned as I am creating a new eBook full of different soap recipes I’ve tested with the hot process method. It should be out by the end of the month.
Hugs, Health, & Self-Reliance,
Heidi
P.S. If you haven't already done so, please sign up for our weekly newsletter! You'll get info, recipes, and ideas not found on the blog, PLUS you’ll gain immediate access to the Resource Library which contains the Hot Process Soap Making Checklist & Basic Instructions PLUS a whole lot of other printables for your self-reliance journey! Just compete this form:
P.P.S. Another mention for Jan Berry's Natural Soap Making book. It's excellent. I've been a fan of Jan's for many years. She is an expert at the cold process soap making method, and is very science-y with her knowledge.
If you are interested in cold process, I recommend her book, as well as my other friend, Kelly Cable's Soap Making for Beginners., which is where the recipe on my site for Goat Milk & Honey soap came from!
If you want to try the hot process soap making method, though, I think you should try my book. There's just not a lot of great information out there about hot process soap, and I've tried to remedy that with my book.
Disclaimer: I am not an expert soap maker. These are my personal experiences and experiments. I disclaim any liability for misconstruing directions, not doing enough research, and not taking proper safety measures in the soap making process. Always use common sense and be safe.